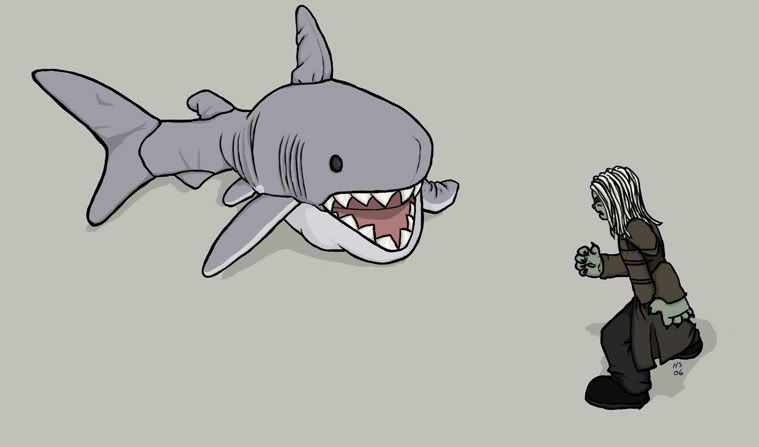
today we will be going from this to 
in GIMP
Go to File>>New
create a new image 100x100 pixles
paste in image. use move tool (shaped like a cross) to make the shark appear in the image area.

paste image again in a new layer. use move tool to make the Wraith appear on the right side of the image.

Set layer to Overlay.

Duplicate layer. Set to Multiply.

Border
Layer>>New Layer.
Select>>All.
Select>>Shrink. enter 4 in the box.
Select>>Invert.
Fill selection with black.
Right click on any layer. Go to the bottom of the menu. Click Merge Visable Layers. Check "Clipped to image". Select Okay.
Save image.
Done
icon by![[livejournal.com profile]](https://www.dreamwidth.org/img/external/lj-userinfo.gif) mizz_destiny credit if you use icon!
mizz_destiny credit if you use icon!
artwork bycynicatlantis
in GIMP
Go to File>>New
create a new image 100x100 pixles
paste in image. use move tool (shaped like a cross) to make the shark appear in the image area.
paste image again in a new layer. use move tool to make the Wraith appear on the right side of the image.
Set layer to Overlay.
Duplicate layer. Set to Multiply.
Border
Layer>>New Layer.
Select>>All.
Select>>Shrink. enter 4 in the box.
Select>>Invert.
Fill selection with black.
Right click on any layer. Go to the bottom of the menu. Click Merge Visable Layers. Check "Clipped to image". Select Okay.
Save image.
Done
icon by
artwork by
Leave a comment